
Walk-In Bathtub Professional Installation Vs. DIY
June 20, 2024Canadian Walk-In Bathtub Manufacturer Appears On Local News To Promote Safer Living With Accessible Bathtubs And Showers
August 19, 2024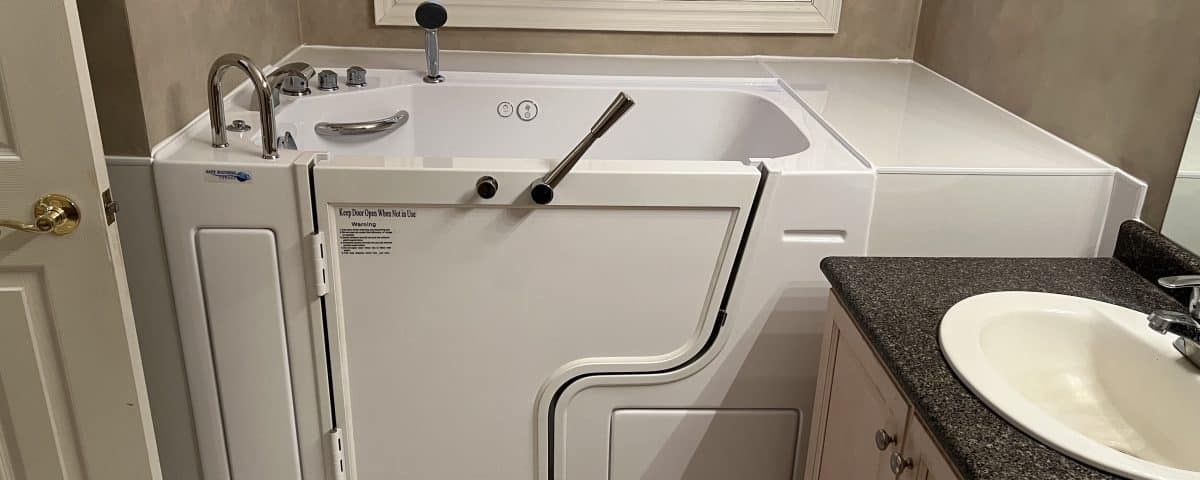
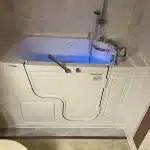
Installing a walk-in bathtub can transform your bathroom into a safe and accessible space, particularly helpful for individuals with mobility challenges. Walk-in bathtubs offer a range of benefits, including easier access, enhanced safety features, and improved comfort. This comprehensive guide will walk you through the detailed step-by-step process of removing an old tub and installing a new walk-in tub, ensuring a secure and professional finish. You’ll have a smooth installation process and enjoy the numerous benefits of a walk-in tub by following the instructions below.
A walk-in tub can significantly improve the quality of life for those with limited mobility, allowing them to maintain independence and enjoy a relaxing bathing experience without the risks associated with traditional bathtubs. The installation process may seem daunting, but with the right tools, materials, and a clear understanding of each step, you can achieve a successful and professional installation. This guide aims to provide you with all the necessary information to complete the process with confidence:
Remove the Old Tub
Removing the old tub is the first crucial step in the installation process. Start by turning off the water supply to prevent any leaks or water damage during the removal. Next, disconnect the plumbing fixtures, including the faucet, showerhead, and any attached pipes. Carefully remove any surrounding tiles or panels to expose the edges of the tub. Use a utility knife to cut through any caulking or adhesive that secures the tub flange to the wall.
Once the tub flange is free, you can disconnect the tub drain. This step might require some tools like a wrench or pliers. After ensuring all connections are detached, you can carefully lift and remove the old tub from its place. This step might require assistance due to the tub’s weight and size. Ensure you have someone to help or use appropriate lifting equipment to avoid injury.
Prepare the Area
With the old tub removed, it’s time to prepare the area for the new installation. Clean the exposed space thoroughly, removing any debris, old adhesive, or caulking. This step ensures that the new walk-in tub will have a clean and solid foundation. Check the subfloor and walls for any signs of damage or water leakage, and repair as necessary. This preparation is essential to prevent future issues, ensuring the longevity of your new tub.
Measure the space so your new tub will fit perfectly. This step involves taking precise measurements of the width, length, and depth of the space. Make any necessary adjustments to the plumbing or structure to accommodate the new tub. It’s also a good time to ensure the plumbing lines are in good condition and ready for the new installation.
Bring in the Walk-In Bathtub
Bringing in the new walk-in bathtub requires careful handling to avoid damage. With the help of another person, carefully move the tub into the bathroom. Walk-in tubs are typically heavier than traditional tubs, so using a dolly or additional support might be necessary. Position the tub in the desired location, ensuring it aligns with the existing plumbing. Make sure the tub is level and stable before proceeding to the next steps.
During this step, it’s crucial to handle the tub with care to avoid any scratches or dents. Walk-in tubs are often made from materials like acrylic or fibreglass, which can be delicate if mishandled. Confirm the path from the entrance of your home to the bathroom is clear of obstacles to facilitate smooth movement of the tub.
Bring the Tub Up to Level
Once the tub is in place, the next step is to bring it up to level. Use a spirit level to check the alignment of the tub in all directions. Adjust the tub’s feet or shims to achieve a perfectly level installation. Ensuring the tub is level is crucial for proper drainage and the overall functionality of the tub. Take your time with this step to prevent any issues later on.
A level tub guarantees that water will flow correctly to the drain, preventing water pooling and potential leaks. Check the level from multiple angles and make adjustments as needed. This step might require a few iterations to get the tub perfectly level, but it’s worth the effort to ensure a professional installation.
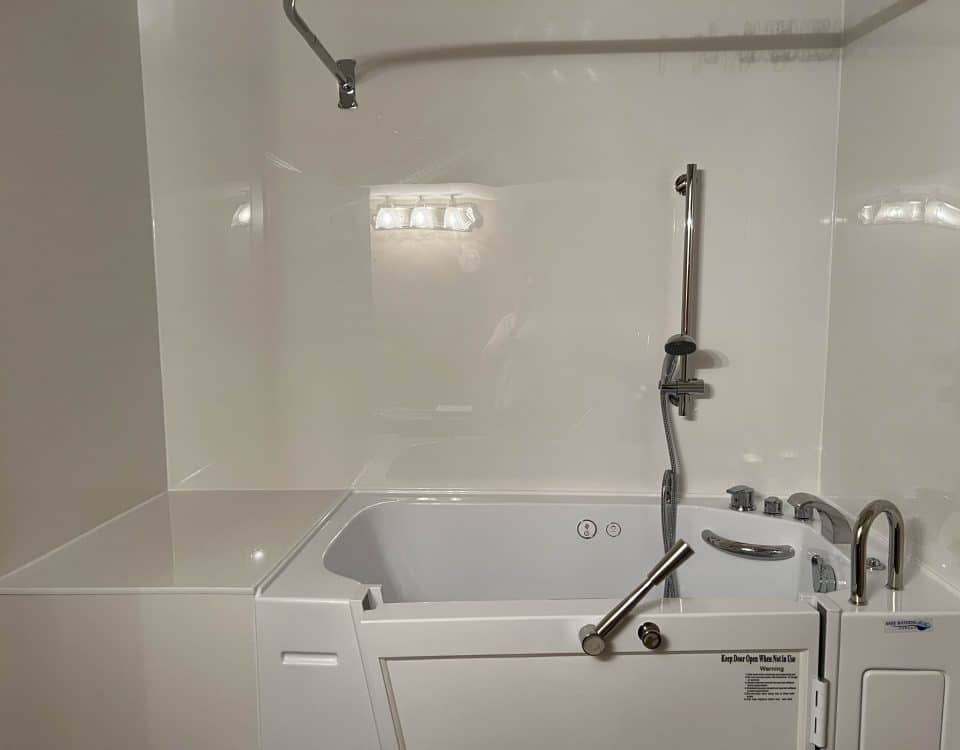
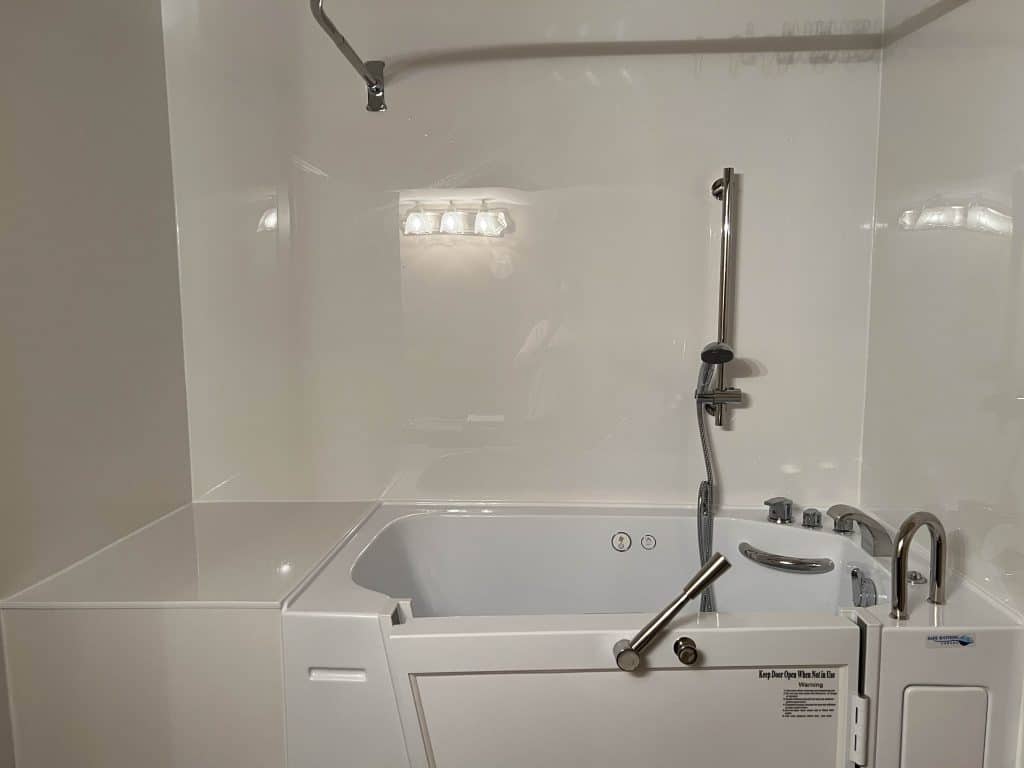
Install the Fixtures
With the tub levelled and securely in place, it’s time to install the fixtures. Begin by connecting the plumbing fixtures, including the tub drain and water supply lines. Follow the manufacturer’s instructions for connecting the fixtures to ensure a watertight seal. Attach the faucet, showerhead, and any additional accessories that come with your walk-in tub. Make sure all connections are secure and free from leaks.
This step involves several smaller tasks:
- Connecting the Tub Drain: Make certain the drain is aligned with the existing plumbing. Use plumber’s putty to create a seal and tighten the drain securely.
- Connecting the Water Supply Lines: Attach the hot and cold water supply lines to the corresponding inlets on the tub. Use Teflon tape for a tight seal and to prevent leaks.
- Installing the Faucet and Showerhead: Follow the manufacturer’s guidelines for installing these fixtures. Ensure all connections are tight and test for leaks before completing the installation.
Complete the Fit
To complete the fit, secure the tub flange to the wall studs using screws. This step firmly anchors the tub in place, preventing any movement. Apply a bead of silicone caulking around the edges of the tub to seal any gaps and prevent water leakage. Reinstall any tiles or panels that were removed during the old tub removal process. Take your time; a neat and professional finish will enhance the overall look of your bathroom.
Securing the tub flange properly is crucial for the stability of the tub. Use high-quality screws and solidly drive them into the wall studs. Apply silicone caulking generously but neatly, smoothing it out with a caulk finishing tool for a clean finish. Reinstalling tiles or panels may require some cutting and fitting to match the new tub’s dimensions.
Conclusion
Installing a walk-in bathtub can significantly enhance the safety and accessibility of your bathroom. By following the detailed steps above, you can achieve a professional and secure installation. Whether you’re replacing an old tub or upgrading your bathroom for better accessibility, a walk-in tub offers numerous benefits. Ensure all connections are secure and test the fixtures before using the tub. Enjoy the comfort and peace of mind that comes with your new walk-in bathtub.
By following this guide, you can confidently remove an old tub and install a new walk-in tub, enhancing the safety and functionality of your bathroom. Remember, proper preparation and attention to detail are key to a successful installation. If you have any questions or need professional assistance, our team at Safe Bathing Canada is here to help. Enjoy the enhanced safety, comfort, and independence that a walk-in bathtub provides.
For more information on walk-in tub installation or to explore our range of accessible bathroom solutions, fill out the contact form below. Let us help you create a safer and more comfortable bathing experience.